Rube Goldburg Project
Intro:
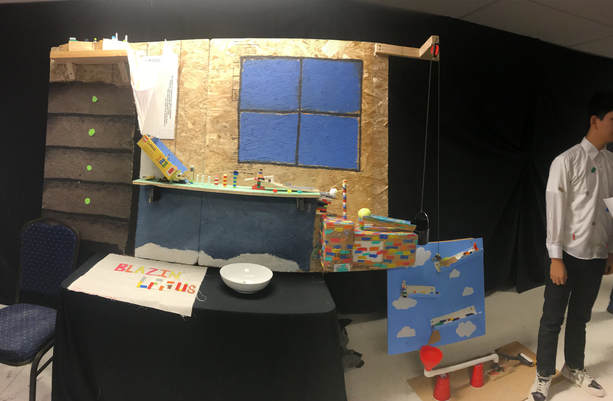
In my Rube Goldburg project I have had no experience whatsoever on building a Rube Goldburg machine and I was completely nervous on building a machine that works efficiently and smoothly. We had to have 3 simple machines on our project and at first I was not sure how I was going to put 3 simple machines, but once I had my rough draft I found it wasn’t as hard to place it all together since once I was building I noticed I was making simple machines while building without even knowing it. My 3 simple machines were Inclined plane, Lever, and a Pulley. When my Rube was running I noticed it had 3 physics principles as well. Momentum/Speed, Kinetic energy, and Potential Energy.
Kinetic and Potential Energy Problem/ Answers:
“If a Rube Goldberg machine begins by dropping a 7 gram steel ball 50 cm into a bucket on a pulley system.” For Potential Energy you could find the answer by Multiplying the Kilograms by the height by the gravity. In this case it would be 0.5m • .007-km • 9.81 m/s to the 2nd power = 0.0343J
“When your steel ball land in a tiny bucket it has a velocity of of 45cm/s. Calculate the kinetic energy of your steel ball. Show your work. KE(joules)=(½ mv squared) For Kinetic Energy you could find the answer by Multiplying the Mass by the Velocity and by 0.5. In this case it would be, 0.5 • .007 • 45 cm/s squared = .1575 J
Conclusion
For my Rube Goldburg design to know exactly what I was going to do we made small Rube Goldburg projects before we did the big actual ones and it gave me a lot of ideas to see how me and my group were able to finish a small Rube in 2 days and with these ideas I was able to draw out a rough design on paper of my main idea. Once I started building I noticed some things couldn’t be done and I thought up new ideas on what I could add. From the 21st century skills list I believe my area of strength on this project was Effective Communication because I used it for every part of my project! Weather it was what color the background was going to be, to how we would put all of our designs together and make them work together. For my area of growth on the 21st century skills I believe mine was Critical thinking because even though I did use it for building my part of the project, but I could have used it more to help me make not only my project but all of my group members projects work smoothly and functionally.

Electromagnetism Project
Tutorial
Cut two pieces of paper (2x6)
Take a magnet strip and roll the paper around it.
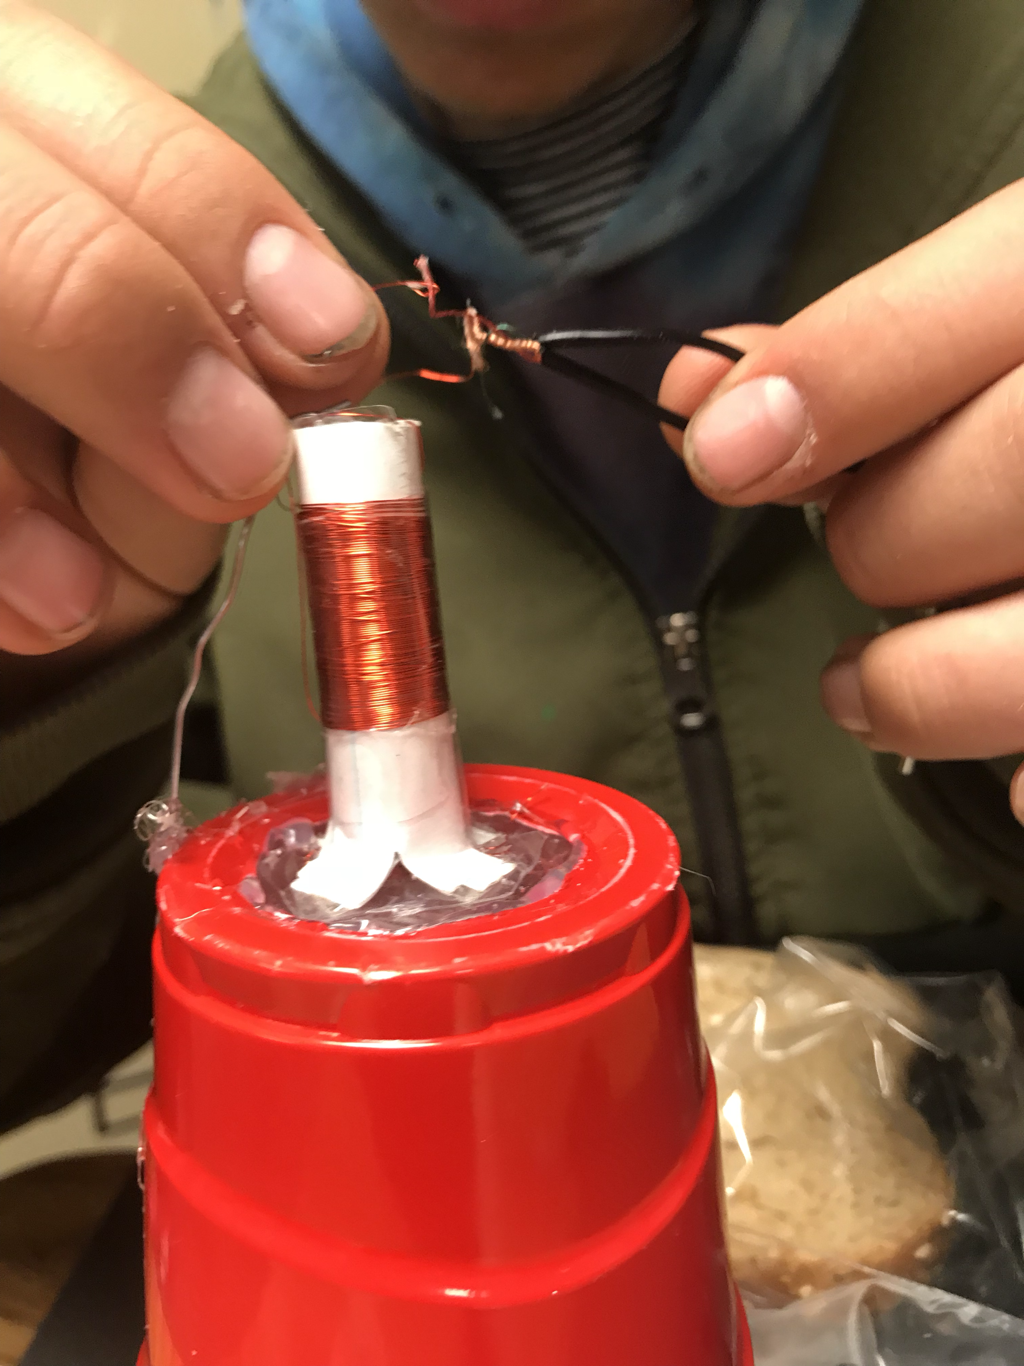
Wrap the coil around it 80 times and leave about 2 inches of wire loose on both ends.
Use some hot glue to the wires to help them from uncoiling.
Make 4 cuts on the paper and push the slits outward.
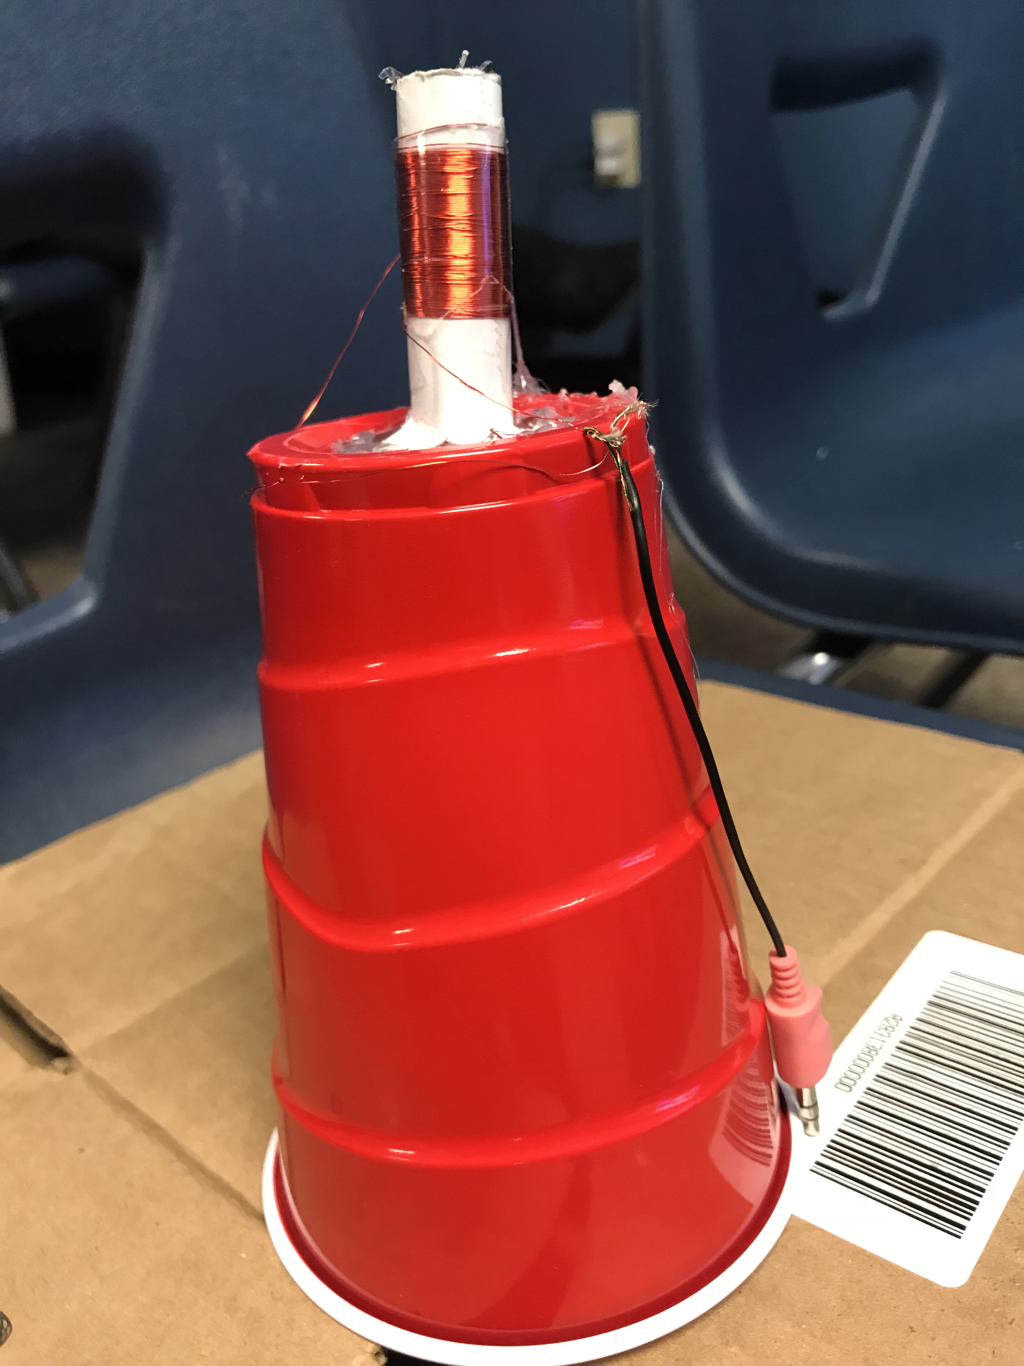
Glue the paper roll to the bottom of the cup.
Cut the cup around the paper so you get a circle in the middle of the cup.
Cut a ring around the top of the cup that is about one inch in diameter.
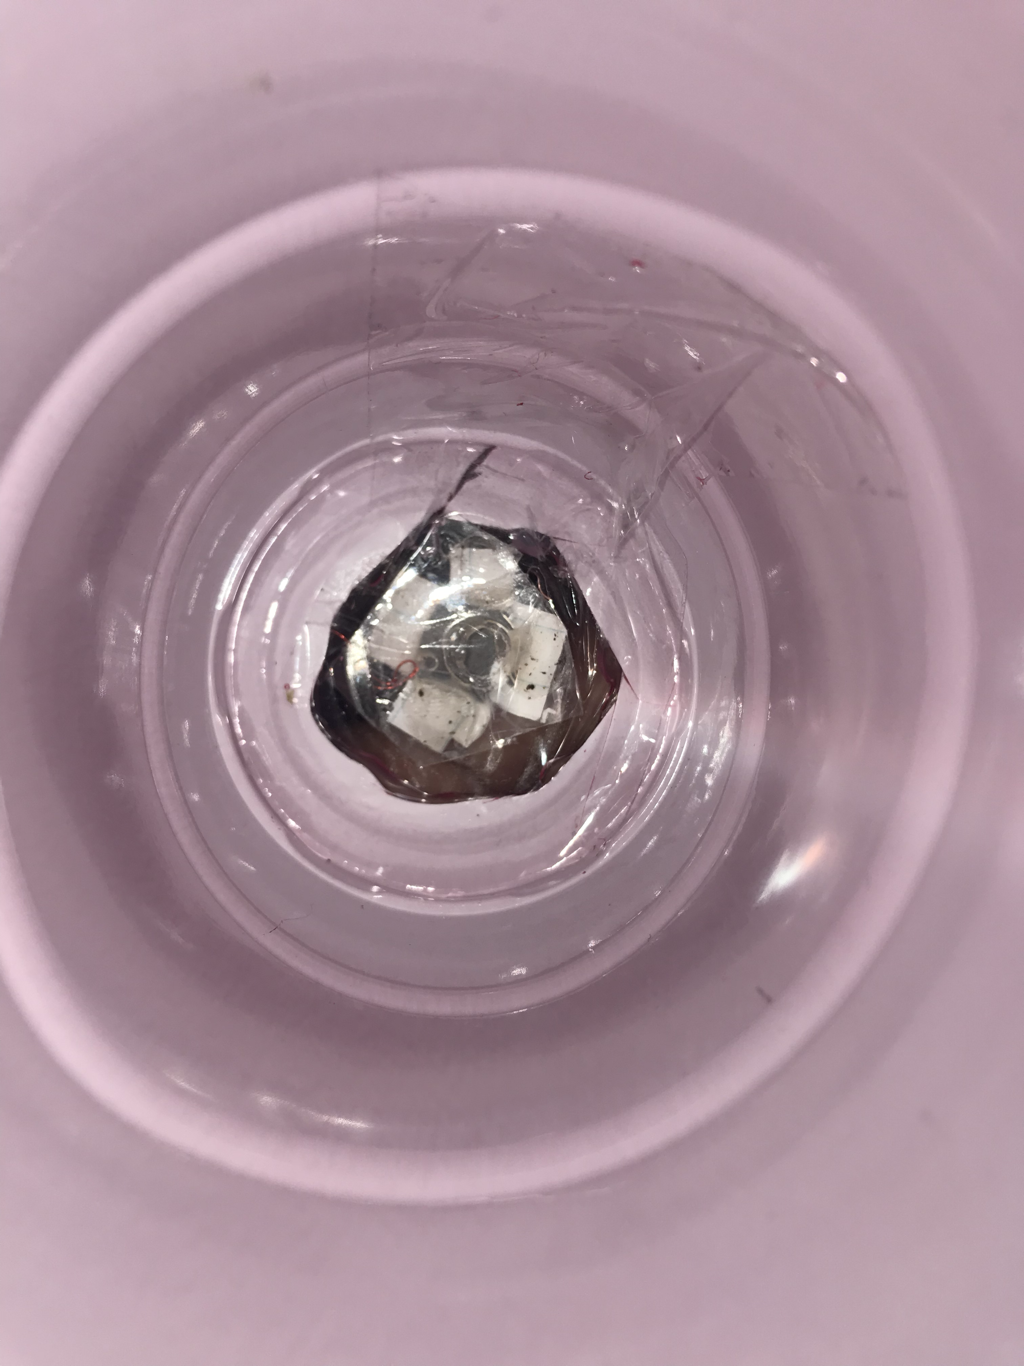
Cut a circle of tape that is slightly bigger than the cup.
The sticky part should face the bottom of the cup.
Stick the coil on the top of the sticky part of the cup.
Straighten the paper clip with some wires.
Create a spiral at the top of the paper clip and attacht the spiral to the magnetic part and attach the straight part to the side of the cup.
Scrape or burn the insulation off the ends of the wires that are attached to the magnet and paper roll
Take a headphone jack and cut off about 4 inches of wire from the jack
Take the wires and figure out which one is the negative and positive
Attach the negative and positive to the wires and if there is an extra wire than leave it
Plug it into an audio device than play some music.
Explanation: What we made is a speaker that plugs into your devices auxiliary plug and plays music and how it works is the electricity from your phone goes up the coil and interacts with the magnets inside and it creates a vibration that creates a sound, aka your music. This connects to electric magnet by sending electromagnetic signals through the coils into the magnets to send out sound frequencies and sounds.
Materials:
Plastic Cup
Copper wire
Scissors
Hot glue gun
Hot glue sticks
Paper
Magnets
Auxiliary jack
Tape (Optional)
Paper clip
Cut two pieces of paper (2x6)
Take a magnet strip and roll the paper around it.
Wrap the coil around it 80 times and leave about 2 inches of wire loose on both ends.
Use some hot glue to the wires to help them from uncoiling.
Make 4 cuts on the paper and push the slits outward.
Glue the paper roll to the bottom of the cup.
Cut the cup around the paper so you get a circle in the middle of the cup.
Cut a ring around the top of the cup that is about one inch in diameter.
Cut a circle of tape that is slightly bigger than the cup.
The sticky part should face the bottom of the cup.
Stick the coil on the top of the sticky part of the cup.
Straighten the paper clip with some wires.
Create a spiral at the top of the paper clip and attacht the spiral to the magnetic part and attach the straight part to the side of the cup.
Scrape or burn the insulation off the ends of the wires that are attached to the magnet and paper roll
Take a headphone jack and cut off about 4 inches of wire from the jack
Take the wires and figure out which one is the negative and positive
Attach the negative and positive to the wires and if there is an extra wire than leave it
Plug it into an audio device than play some music.
Explanation: What we made is a speaker that plugs into your devices auxiliary plug and plays music and how it works is the electricity from your phone goes up the coil and interacts with the magnets inside and it creates a vibration that creates a sound, aka your music. This connects to electric magnet by sending electromagnetic signals through the coils into the magnets to send out sound frequencies and sounds.
Materials:
Plastic Cup
Copper wire
Scissors
Hot glue gun
Hot glue sticks
Paper
Magnets
Auxiliary jack
Tape (Optional)
Paper clip